The least expensive flashing tape option is also the most complicated to install. Unless you've done it a bajillion times
OFFICIAL TRANSCRIPT:
Dan: The first steps in the process involve prepping the rough opening. The carpenters have to fill in the extra pieces above the window to flush things out.
David: "We like to install windows over a sloped sill, so we use beveled siding. I'll put a couple of nails in there to hold it in place because we will be shimming the window on this and putting a peel-and-stick membrane on it."
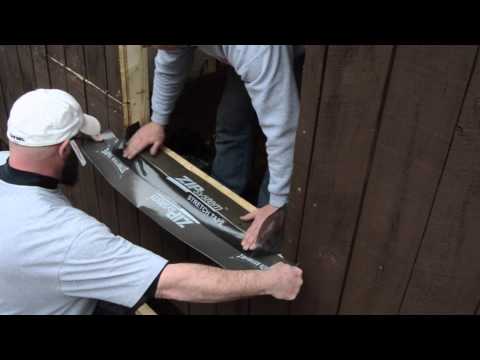
Dan: Some tapes can stretch around corners, but David’s going to demonstrate with a standard, non-flexible flashing tape.
David: "You see there's a little piece of plastic inside, like a fishing line."
Dan: First, he splits the release sheet.
David: "Pull that out."
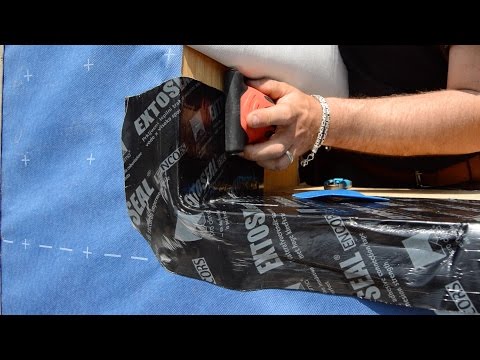
Dan: He works from the center out to either side, keeping the flashing tape along the inside edge of the window.
David: "Later on we're going to put 4 inches of foam on this house. So we'll put another piece [of flashing] on; we want to be able to go out over the 4 inches of foam and turn down."
Dan: Now we can cut the tape—not quite all the way, which leaves a little bit to stretch.
[INSTANT REPLAY]
David: "I'm putting 2 inches to the outside and the rest is going inside."
Dan: David wraps the corner, putting only as much peel-and-stick inside the rough opening as the depth of the window. He cuts the bottom, but again not tight to the corner so he can bend the tape around.
David: "The corner is the weakest point—and we've crossed it twice. Then we can put another little piece on that will go over it again. Even though this would be kind of like a reverse-flash, it is already flashed. It's not really a reverse-flash."
We're giving the corner, the weakest point, triple coverage.


