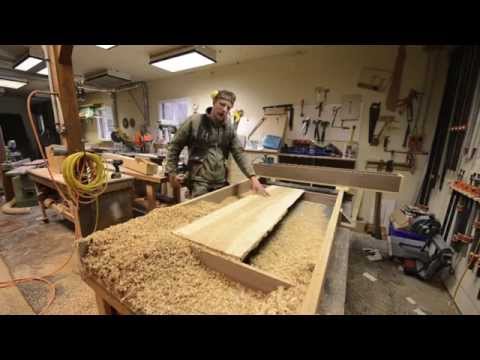
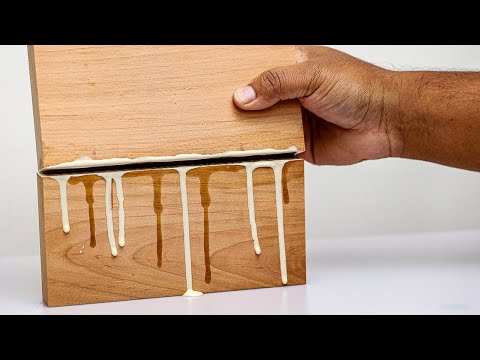
The ability to glue-up flat panels is probably the single most important skill that you can have as a furniture maker. In this video, Chris and Shaun of Foureyes Furniture, go over the top seven things that you can do and avoid doing in flat panel glue-ups. The more of these tips you incorporate into your workflow, the better off you'll be. (This is a lightly edited transcript).
Pick straight and flat lumber for flat panels
Okay, the first thing we can do to achieve the best possible panels is to choose the straightest and flattest lumber that we can find. We often have to contend with things like bowed, crooked, and twisted boards. So let's talk about some of the things to look for when picking out lumber.
First, how straight and flat are the boards? It's pretty obvious that the straighter and flatter the lumber is to begin with, the better your panels are going to come out. But sometimes we aren't lucky enough to find perfectly straight and flat boards. So we have to weigh our options. We obviously have machines that can help us get our material too straight and flat, but making considerations first and not totally relying on your machines will help get better results.
I'll get into some of the reasoning when I talk about milling, but for now, I'll try to keep it simple. And I have two ways of thinking. The first is if I'm going to be keeping boards long, maybe for a big tabletop or if I'm going to be cutting them up into smaller sections, maybe for cabinet panels.
So with that in mind, if a board is bowed, it's very likely that I'll be able to use it. For the most part, a bit of bow is not something to worry about as there are multiple ways to make it work, as long as it isn't extreme. If a board is crooked, it's also very likely I can use it during the milling process. One of the main things we do is cut straight edges onto all of our boards, so this really isn't a big deal.
Now, if a board is twisted, I'll almost always try to avoid it, unless I know that I'll be cutting it up into smaller sections, which can then be milled much easier. So I just consider how bad the twist is. If a board is kinked, maybe where there's a large knot or something similar, for the most part, I'll try to avoid that as well.
The other thing to think about in addition to all of this is how the lumber looks. So much of making panels has to do with how well all of the boards match and making the seams look as seamless as possible. So I always try to find boards with matching color and grain and weigh that against the quality of the boards.
Mill lumber with a consistent process
Ideally, when milling lumber, the process would start with jointing one face of a board, then planing the opposite face to get them both flat and parallel to each other. Then, I joined one edge of the board to get it straight, then took it to the table saw to rip the opposite edge to get that flat and parallel as well.
And though this is how it's usually done, there are times when this isn't possible. Sometimes a board is too wide for our jointer or too long and thin to joint flat. So let's talk about some of the considerations.
The first thing I like to do is rough-cut boards to the shortest length I can while still leaving myself plenty of working room. If a board is bowed or crooked, by cutting it into shorter sections, a significant amount of the bow or crook can be diminished, and any bit that might still remain in these shorter sections can be flattened or straightened during milling.
But let's say you're making a large tabletop, and you need to leave your boards eight feet long. If a board has even a moderate amount of bow in it, and we attempt to joint the first face flat, we would very possibly need to remove so much material to get it flat that the board would essentially become unusable, especially if we are starting with thinner boards like four-quarter lumber. And we certainly don't want to buy unnecessarily thick boards just to be able to get them jointed flat.
So what we'll often do with longer, thinner boards is skip the jointing step altogether and just plane both sides. Then we can joint and rip the edges. This won't eliminate any bow in a board, but if we're careful to buy the straightest lumber we can, we should be able to correct any leftover bow during the glue-up.
Okay, so you've done everything you could so far. You bought good boards, you milled them up the best you could, but in all likelihood, your boards aren't perfect. But there's still plenty of things that you can do to get the flattest panel possible, and the first of those things is picking grain orientation.
Orient grain with movement in mind
Let's pretend that I've got a three-board panel, and I like all the faces equally, but I noticed that they all have just the tiniest amount of bow to them still. Here's an example of what I'm talking about. Well, rather than gluing them up like this, you would want to flip one of them so that the direction of the bowing is opposite. That way, instead of having three boards all pulling in the same direction, you can have a tug-of-war going on that hopefully keeps things in balance.
Now, if the boards are so flat that you can't even see any bowing, first off, congratulations. But what you can use here to figure out what orientation to use are the rings that you can see by looking at the end grain. Basically, if you look at all of them, and you can see this sort of pattern, rather than putting all three boards like this, alternate one of them so that you end up with a wave pattern.
Now, in reality, this is more indicative of potential cupping, not bowing. So I only use this to determine my board orientation if I'm 100% completely indifferent as to what face shows. Otherwise, if we're doing a good job everywhere else, then I'm just gonna pick the side that I like the looks of the best. And that hasn't failed me so far.
Alright, at this point, you would think that we're ready to glue up our panels, but there's still some prep work to do. So I'm going to show you an example of how good boards can create bad panels and what we can do to avoid that.
Make the cut edges consistent—if not square
So what can happen is that because the panel's gonna follow the geometry of the board's edges, and your edges probably aren't perfectly square, rather than making a flat panel, you might be making a barrel. And the more boards that are a part of your barrel or panel, the worse things are gonna get.
Thankfully, there's a really easy fix to this. So in an ideal world, you wouldn't need to fix it because you'd have a perfect 90-degree fence on your jointer or a perfectly 90-degree angle set on your blade when you created this edge prior to assembling. But in reality, even the most perfect tool setup is probably slightly off.
So a really good way to combat that is with what's called the "In/Out" and/or "Up/Down" method. In either case, what you're going to do is lay out all of your boards in their final orientation that you like. Then you're going to write "in" and "out" on the face of each of the mating edges of your boards. From there, you're going to take one more pass on the jointer with each face labeled "in" facing in and each face labeled "out" facing out.
So now, no matter how off your jointer fence is, since you're alternating your cuts, you're creating complementary edges on your boards, which is going to result in a flat panel instead of a barrel. For the "Up/Down" version of this, it's really the same exact idea. Only instead of joining pieces either in or out, you're taking one last rip on the table saw with the piece facing either up or down. And again, by doing this, you're creating those complementary edges which will give you the flat panel.
Dowels, dominos, and biscuits
So dowels, dominos, and biscuits aren't a bad thing. And actually, dowels, dominos, and biscuits can be a good thing. But an over-reliance on dowels, dominos, and biscuits can be a bad thing. Basically, people have this tendency to think that dowel biscuits are some kind of magic solution to perfectly flatten your panels no matter how bad they are. And that just isn't true.
Really, the main place that I use dowel biscuits is when I'm in need of coplanarity, which just makes for an easier glue-up, thus helping you to get a better panel. So maybe I have one board that's just a little wonky or even just one spot of one board that's where they can really shine. I mean, I guess in theory, you could have some banana boards, and you could just reverse them and use a bunch of dowel biscuits to hold it all flat, but I wouldn't want to rely on that being the case.
I think a really good way to think about dowel biscuits is, while they aren't a magic fix-all solution if you've done a good job of getting to this point, they can really help you get that last little 5% of flatness that you're hoping for if you missed somewhere else.
Clamp like you've been here before
Alright; everything that we've done so far has been leading up to this point. You milled your boards, you picked good orientation, everything's looking good, and you're ready to go. But you're not out of the woods yet. So the next thing that we're going to talk about is clamping strategy. And I think it's good to start here with an example of what not to do.
So here's a clip from the video where I was building this piece, the Surly table, which is a round table. So the flat panel for the top was pretty wide, and I promised that here I had taken every step possible to get a good panel. I'd even loaded it up with dominoes, as you can see here.
But when I started clamping it up, look at how the entire panel wanted to fold up like a taco shell. Well, that's because at this point, all of the clamps are on the underside of the table. But as you can see here, as soon as I put some clamps on the top side and started clamping, everything flattens back out.
So the takeaway here is don't put all of your clamps on one side. You want to try to get even pressure on both faces of your panel so that it stays flat while it's gluing dry. A few other things about clamps: if you're having trouble with coplanarity but you either can't or don't want to use dominos, that's not it. Dowel minokits, domeskidos, dowmiscuitos—you can use clamping calls.
Now, I'll be honest, it's pretty rare that I use these, but the basic idea is you get a piece or pieces of wood that run perpendicular to the boards of your panel, and you clamp those from both ends to help hold your pieces coplanar while the glue is dry. Now, if this is something that you think you might do often, you can even get specialty clamps like these deluxe panel clamps from Rockler, which are kind of like a panel clamp with cauls built in.
Something I do pretty often is use clamps on the ends of my panels because this is usually the hardest spot to keep things coplanar. Because you might not be able to get down to misquitoes that close to it, and it's just harder to get clamping pressure sometimes.
After glue-up adjustments
Okay, so let's assume that the worst has happened. You did everything you could, but for whatever reason, your flat panel still has a slight bow to it. Well, thankfully, there are still a few things that you can do to fix it. And the first of those things has to do with how the panel is going to be used.
Usage: So you would think that the last place that you want a bowed panel is for a tabletop. But I personally think that a slight bow on a tabletop is less noticeable than a bow on a cabinet panel. And the reason for that is that on a table, it's really hard for your eye to pick up on any small discrepancies, like if you had an eight-foot-long table with a quarter inch of bow in the middle, you'd probably never notice it.
But in a cabinet with drawers or doors, if you have a quarter-inch bow in your top panel, seeing a gap that's a sixteenth of an inch on either side but 5/16 of an inch at the center is gonna look like the Grand Canyon.
Well, here's the good news. If you're building a small cabinet, chances are that the boards are so short that there's not going to be any bow. And if you're building a large cabinet, chances are that there's going to be at least one vertical partition in it. So as long as you make the length of the vertical partitions match the interior height of your cabinet, you can use that to your advantage to pry or pull your panel flat.
Honestly, the main place that I've used this has been when I was working with large plywood cases, and I really didn't have any control over the flatness of my panels. It just came down to the plywood.
So all things being equal, when I'm faced with that, I like to make it so that my panel has the convex side facing in. That way, the partition pushes rather than having to pull. On tabletops, even though flatness is less important, like I said, depending on the design, there are times that really similar concepts can come into play.
I think a good example of this was the giant desk that we built a few months back where the tops were pretty flat, but they weren't perfect. But thanks to the leg design, which basically functioned like giant calls and just the overall weight of the base, any bow was negated.
Now, in different situations, this might not be a solution.
Breadboard ends help to flatten panels
We won't always have the luxury of an apparatus helping to keep our panels flat. But there are techniques we can use like breadboard ends and inlaid c-channel to get a similar result.
For example, a large table with a base that doesn't do much to hold the top flat could benefit from breadboard ends. Breadboard ends are essentially a piece that is attached to the ends of a tabletop with perpendicular grain direction to the rest of the table, which will counteract any movement that might cause the tabletop to cup along its width.
The only thing about this is that breadboard ends have a very specific look. So what can we do if we don't want to change the way a panel looks but still ensure it will remain flat?
Inlay C-channel to flatten a panel
Inlaid c-channel works in a similar way, though it's less conspicuous since it's attached to the underside of the table. By inlaying and attaching metal c-channel, the table can be held flat without changing the way it looks from above, which is very likely the main reason for doing it this way.
