In the last episode of Building Resilience, we were framing a roof over a roof, trussing another roof, and sheathing it all with ZIP System sheathing.
After that, we taped the seams and talked about it
"This is the first time that we’ve used Zip System roof decking. And we’re pretty excited.
We saw that video showing how well it stands up under hurricane-force wind and rain just being taped. And that adds a degree of confidence for us when we’re framing out a flat roof like this.
We love EPDM, we love flat roofs and TPO, they work really well. But being able to be dried in while we work, before the roof goes on is going to help us with our timeline and if there’s a failure in the EPDM at some point, the likelihood that we’ll see that come in, is lower.
I feel like that’s an extra layer of protection that we’ve got in there now."
This time, we're pulling sheets of ZIP from a different pile. The pile of ZIP R-12 exterior insulating panels, which we’re using to skin over the existing house.
Working around the penetrations is only one aspect of difficulty posed by retrofit work. The biggest challenge is the window openings, which are currently filled with old windows.
Cutting the sheathing properly
So…
to fit the replacements
We’ve definitely gotten better at…
requires some thought
for previous jobs, we’ve used a different window where we can just go right over the Zip System. We don’t have to do any of the bucking out that we’re doing.
I normally don’t like bucks. So we came up with this system for bucks that were concealed. There was a question about how well it would work, but we’ve really got it dialed in now; we’re almost friction-fitting these things in place.
We’ve got two beads of low-expansion foam that we’re putting in there—just a little belt and suspenders to make sure we’ve got a good air seal around those bucks.
Fenestration is the weak part of the system, and we want to make sure we don’t have any airflow in and around the windows, that could cause funky condensation around the units, and that would be bad.
On this wall, we’ve got an existing house that meets new construction. The existing house does kind of a twist and lean, which is pretty typical for balloon-framed houses; they tend to have a little bit of a pull toward the inside.
So, we’re perfect at the bottom; we’re pretty imperfect at the top. And that’s OK; we’ve got a furring strip shim in there, planing it out. By the time we get about six feet into the existing house, we’re able to go flush against the sheathing again.
To make up for the out-of-plumb wall, Sol cuts long shims to fur out the transition.
And then Michael slowly fills the gap with some cold canned foam, and Sol taps a shim into the gap.
He also places another shim under the first section of the next panel, but that’s it. The far edge can be bent to the house, which will smooth the transition between old and new.
Young Stephen manhandles the panel into place, and Michael nails it off.
With flanged windows and thick exterior insulation, you can nail through the flange, through the insulation and anchor directly to the framing.
The Marvin Modern Casement windows that we’re installing are fastened through the jambs, not the flange. And because foam has really cruddy holding power, the design team needs to figure out a buck system.
Here’s what they came up with.
Surround the window with 2x2s and cut back 1-½ inches of the foam.
In animation land, all of the joints are tight, but in the real world, they use beads of canned foam to make sure the joints are tight.
The retrofit bucking system begins with cutting away the old window frame and adding enough strips of wood to create backing for the new bucks.
It’s dusty, messy, and a little bit ugly, byt the cuts have to be clean. They are the substrate for the new bucks and will establish the new window’s position to some extent.
Measuring off the floor, they establish where the top of the bottom buck needs to be, and Sol snaps a line.
Now it’s the same old carpentry game: Put it on the line and nail it. Or screw it, as the case may be.
Same drill up top, put it on the line, and screw it.
Strips of Advantech subfloor thicken the existing jambs to create solid backing for the window bucks.
Sol measures them all and then marks and cuts them all at the same time because he is an efficient carpenter. He also wants to get the exterior done as soon as possible so he can go inside and work. But that’s not really how it’s gonna shake out for Sol.
The bucks need to be placed with a purpose because they determine the window location, and there’s very little wiggle room on the inside stops.
Sol: "These are tightly measured to fit really tight to this (existing jamb), because there’s just that ⅜ inch stop inside to cover it, so we want to be as close as we can."
With the window frame all bucked out, they are ready to add some ZIP R-12 to the mix.
Cold weather has a way of making things move slower. The cans were kept inside, and outfitted with custom neoprene coozies (Editor's note: I refuse to spell it with a 'k') to keep them warm, but 10 degrees is ten degrees any way you look at it.
Unless you look at it on a centigrade scale, in which case it is -12 degrees. So, yeah. still cold.
We pretend we are shooting a slo-mo video, but Steven doesn’t cooperate.
With the canned foam flowing, Sol circles the opening with two beads, and I found a solution to the cold can blues.
They slip the ZIP R-12 panel into place and tap it home.
You can see the foam bead squeezing out a little at the top buck. This is good.
Nail it.
Michael adds more canned foam to make up for some irregular geometry, and the crew gets after the rest of the house.
It’s a good thing, too, because a truckload of windows and doors are coming soon from Marvin, and the best place for a window on a jobsite is installed in the wall.
Coincidentally, that—along with the Modern multi-slide door are what we’re going to cover next time.
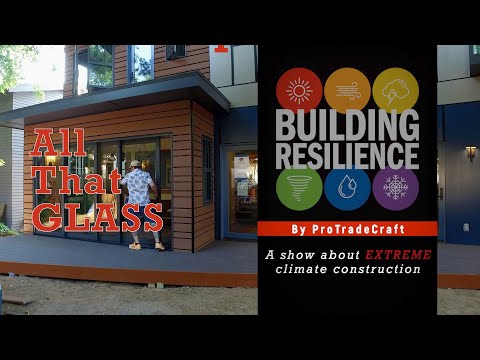
"And you can see over here, this is the new Modern Multi-slide stacking door from Marvin. It provides an incredible view to the exterior."
And what’s really cool about this thing is that the whole thing opens up. So now, the door has been stacked into one door width wide, which gives us all of the rest of this opening free and clear.
It’s a good place to sit and observe the debris field that is a jobsite.
Stay tuned and stay resilient.
