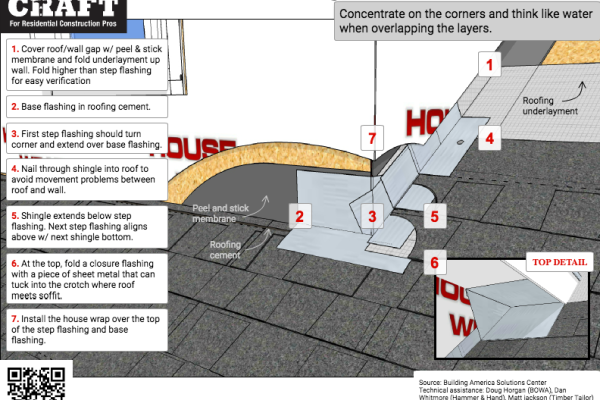
Concentrate on the corners and think like water when overlapping the layers
The last time we were on the roof, it was to install some valley flashing. This time we’re going to hop over to the other side and flash a dormer.
First, we’ll strip away the layers—
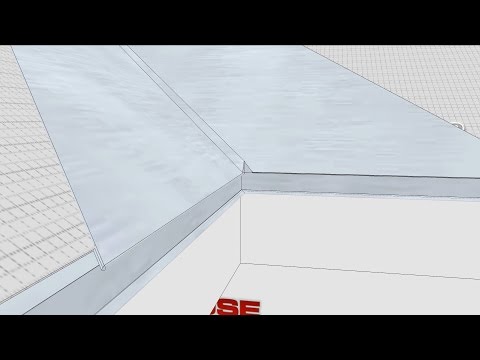
and begin at the beginning, with a couple of courses of roofing membrane and the drip edge flashing.
Step by step dormer flashing:
- Roofing underlayment can be installed on the roof, but hold it back from the roof wall joint.
- Cover the connections with peel and stick membrane and then fold the synthetic underlayment up the wall also.
- Underlayment and peel and stick should go higher than the step flashing, for easier verification.
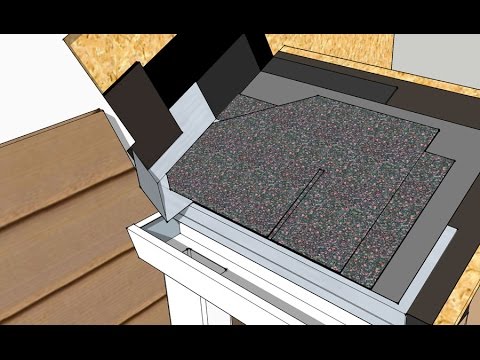
- Install shingles to the base of the dormer, notching the end piece appropriately.
- Lay a bead of roofing cement along the top of the shingle course just below the dormer and bed the base flashing into it.
- The first piece of step flashing should turn the corner and extend over the base flashing.
- Nail it through the shingle into the roof to avoid wood movement problems between roof and wall.
- The next shingle extends below the previous step flashing.
- And the next step flashing goes on top, aligned above the next shingle. And so on … Continuing up the side of the dormer.
- At the top, fold a closure flashing with a piece of sheet metal that can tuck into the crotch where roof meets soffit. You can bed it in roofing cement.
- The next row of shingles can slip under the closure flashing.
- Finally, you can install the house wrap over the top of the step flashing and base flashing.
Now, you’ve got a roof/wall joint that won’t leak into you good-night’s sleep.
—Technical assistance from: Doug Horgan (BOWA), Dan Whitmore (Hammer & Hand), and Matt Jackson (The Timber Tailor) | 3D Modeling: Matt Jackson and Dan Morrison | Music: As I Figure by Kevin MacLeod | Produced by: Dan Morrison
