This decking tutorial video is from Trex, one of ProTradeCraft's sponsors. It covers how to install Trex Enhance decking on a 12 x 16 deck frame. The following is a lightly edited transcript of the video.
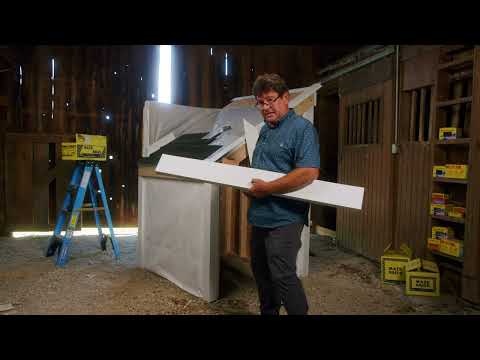
Starting with a completed pressure-treated lumber frame, today we'll be finishing the project with Trex Enhance Naturals Rocky Harbor decking. I find that positioning my sawhorses so that they're parallel with the orientation of the deck board makes cutting easier. While this video isn't about deck framing, I do want to point out a couple of things before we get started.
Install the first Trex deck board
Installing our first deck board, which for me is always at the outside of the deck frame. First, I want to point out how we're supporting our picture frame border here. We've added two joists blocking, one to support half the picture frame board and the other to support the deck boards coming into the picture frame at a right angle. These are called structural blocking joists.
Blocking joists are secured on both ends with Simpson Strong-Tie 7-inch angles or L70 Z angles. And second, that we've applied Trex Protect joist and beam tape. Trex Protect acts to extend the life of the frame by sealing around fasteners as they penetrate the pressure-treated lumber, as well as minimizing moisture into the frame.
Overall, as you can see, I'm using the Trex Enhance board without a grooved edge for the outside perimeter of the deck. Picture frame borders and stair treads are some of the two most common applications for square edge boards.
I built the frame taking into count the thickness of the Trex fascia and the overhang of the picture frame border, which means my picture frame board, which is my first board, will overhang the rim joist on both ends by an inch and a quarter. I like to work from the outside rim back towards the house. That way, I'll always have a full board out front where it's most noticeable.
Notch Trex decking around the posts
To simplify cutting around these posts, I pre-cut and notched the first two boards. Before I start measuring and cutting the first board, I like to install some 12-inch pieces of scrap wood to serve as blocks, which help me maintain a consistent overhang for the entire length of the board. In this case, the blocks will be an inch and a quarter wide.
Rather than measuring the length of the picture frame board with the inch-and-a-quarter block in place, I can clamp the square-edge board on top of the rim joist. Now, it's as easy as marking the end of the board at 45° to the block.
It's important to get a clean cut on the mitered corners. For this, you have two options: a miter saw or a circular saw. Either works, but both work best with a new or very sharp blade. Once I've cut the full board to length, I then clamp it to the post. Now, I'm ready to mark the inches around the posts. The width of the notch will be the width of the post plus a quarter inch on each side of the post. The depth of the notch will be from the edge of my inch and a quarter block minus a quarter inch.
Why oversize the notch by a quarter inch? To allow for any expansion or contraction of the frame and, to some degree, the decking. Plus, it just makes installing the deck board easier. Rather than trying to force the jigsaw blade to turn a sharp corner, I drill a hole in one inside corner that's larger than the blade. This allows me to easily turn the corner and continue with my cut.
I like to make the first two cuts with a circular saw, then finish the notch cuts with a jigsaw. Since the notch cuts won't be seen, these cuts don't need to be exact or perfectly straight. The oversized notch will be hidden under the rail post sleeve and skirt. After I attach some more inch and quarter blocks to the outside of the rim joist, I flush the edge and ends of my first boards to the blocks and clamp it in place.
Fastening the first Trex deck board
It's important to use an approved composite deck screw when fastening Trex decking through the surface or face of the board, which is what's necessary to fasten your picture frame board. These screws have a double set of threads that promote a clean and finished look. A standard wood deck fastener will create an undesirable result. So be sure to use the right fastener. Fasten the picture frame board with two screws at each joist, one at least an inch from the inside and the other on the outside, making sure you're always into the rim joist below to avoid splitting.
Even though I'm at least an inch from the edge and end, I like to pre-drill. I use a 1/8-inch wood drill bit just through the deck board itself, but not into the frame. We're now ready for our second board, which I'll also cut to the exact length and mark and cut the notches for our railing support posts. Determining the length is as simple as measuring from block to block, then subtracting eleven and a quarter inches. In this case, this takes into account I'll have a 5-1/2 inch picture frame board on each end, which equals eleven inches, as well as an eight-inch gap between the deck board and the picture frame board on each end. This allows for movement in the frame as well as expansion and contraction of the deck board.
From here, I just repeat the marking and notching process. Since the picture frame board doesn't have a groove to accommodate our hidden fastener, I ripped a piece of wood for a required quarter-inch gap. Position the end of the board 5-5/8 inches in from the block, then fasten the outside edge of the second board with an approved exposed fastener.
A hidden fastening system
With the second deck board secured, I can now switch to the Trex Hideaway hidden fastening system for most of the remaining deck boards. The look of a deck installed with the Trex Hideaway hidden fastening system is incredibly clean and refined, so it's no wonder most Trex decking is installed using this system.
The system consists of a glass-filled nylon clip with a preset stainless steel fastener that provides the required quarter-inch gap between each groove board. Each bucket includes 360 self-gapping universal deck fasteners, which will complete a 200- to 100-square-foot deck framed at 16 inches on center, similar to this one. The bucket also includes 16 start clips, a drive bit, and instructions.
There are a couple of methods for installing the Trex Hideaway hidden fastener. First is the Trex Universal Fastener installation tool. The fastener tool holds the fastener vertically and hands-free. It also provides a means for applying some pressure on the board during installation. The tool allows you to set the screw completely in a single step, saving time. Once the screw is set, you just pull the tool away and move on to the next joist.
A second method uses a narrow scrap piece of groove Trex decking to trap the fastener between the scrap piece and the leading edge of the deck board. With this method, it's recommended that you initially only seat the screw partway down on the first pass, which means you'll need to return for a second step of fully seating the screw after you've secured the next board.
It's not my preferred method, but if you didn't purchase the fastener tool, this is a legitimate option. Now, I just repeat the process as I work my way back towards the house. For fastening, I simply make sure each board is snug to the hidden fastener before installing the next one. You can either start in the middle of the board and work your way towards each end, or you can work from one end to the other. It's purely a matter of personal preference. If you're working with another person, I recommend starting with a clip in the center, then one in each end, then installing the remaining intermediate clips.
Picture frame the border
Once I install these last two field boards, I'll be ready to cut in my picture frame border on each side of the deck, just like the first two boards and those in the middle. Around the post, I cut the boards to length and notched for my rail post, checking the placement and securing the second to last board using a bar to pry the last board in place. I fasten the edge closest to the house using a Trex-approved color-match composite deck screw.
Now, it's time for us to install our picture frame boards on the sides of the deck. You can always use a chalk box like this one and attach the line to the ends of our pre-cut boards and snap a line. While cutting along a chalk line is common, it is a cut that requires a high level of skill to execute well. If you do choose the chalk line method, blue, purple, orange, and white chalk are all fine, but never black or red chalk, as they'll permanently stain the decking.
Cut square ends on remaining Trex decking
Here's a trick to keep the cut straight, regardless of your skill level. Pull the guard up and set the saw blade against the pre-cut deck boards. Mark the edge of the saw shoe shim a 2x4 so that it's even with the mark. The 2x4 will serve as a guide. Now firmly clamp the 2x4 to the rail posts. Provided you keep the shoe of the saw tight against the 2x4 guides, your finish cut will be as straight as the guide itself.
Lift up the guard enough to clear the deck cord. Slide the saw shoe flush with the 2x4 guides and let down the guard. Gently squeeze the trigger and begin cutting, making sure that the shoe stays tight against the 2x4 guides. Take it slow; it's ideal if you make the cut in one motion. Clean up the area thoroughly as we're ready to move on to the next step.
For the two side picture frame boards, measuring and cutting are very similar to the front picture frame board. Once I'm satisfied with the lie cut and overall length, I just repeat the process of marking and notching for my rail posts, as I did across the front of the deck. As for the end gaps, it depends on the outside temperature during installation. Today is one of the warmest days of the year for the area, so I'll leave a slight gap at the 45° cut and the 1/8-inch gap at the wall.
Make sure to keep the required 1/8-inch end-to-edge gap we planned for in our layout. Just as before, I'm using the Trex-approved composite deck screws to secure the picture frame board to the frame at a maximum of 16 inches on center.
To view more detailed step-by-step videos on how to build an entire deck from A to Z, visit Trex.com Academy.