In this episode of 7 Minutes of BS, we are joined by both Sarah Gray M.Sc., P.Eng., CAHP and Jonathan Smegal, M.A. SC with RDH Building Science—Inc and Lab-or-atories, respectively.
They are here to talk about research done at the Waterloo Building Science Laboratory which measured how much water is actually kicked away from a building when different profiles of drip edge flashing are used.
What it is:
drip edge | drip-ej (n)
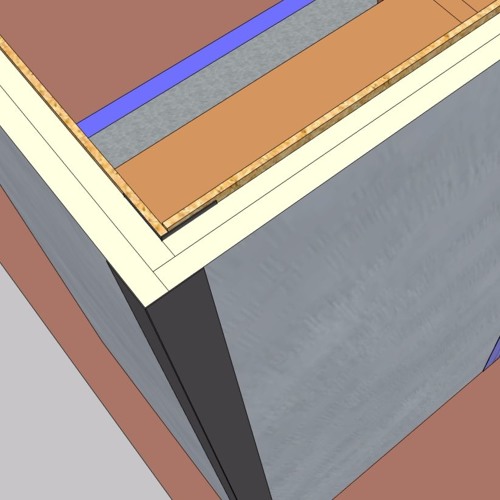
A Drip edge is the leading edge of a flashing, sill, overhang or other linear, horizontal building element, designed to shed water.
—Jonathan Smegal
Yeah, and they’re commonly found at enclosure details such as flashings, overhangs, or transition details between enclosure elements.
—Sarah Gray
...like where one type of siding meets another. Or at the base of a wall where siding sets above a water table band.
JS: Right, or where you have siding above brick. Oftentimes they’ll have drip edges between floors in multifamily or multi-story buildings…
How it works
Drip edge flashings often sit atop the architectural projections that we talked about in a different episode, taking the place of the saw kerf underneath. And we’ll talk about that after we talk about the job description of drip edge.
JS: It’s designed to shed water and minimize the concentration of water on the enclosure surface. Ideally, it sheds water away from the surface completely—but more realistically, some water will drip back on the enclosure below, depending on the geometry of the drip edge, height from the ground, wind flow, and other variables.
SG: The surface tension of water allows it to spread out and really cover a surface—like a sheet. As water sheets down a wall and comes to where the siding ends and brick begins, for example, it fans out horizontally along that surface until it either finds a crack into the wall or drains off the building.
Flashing at these joints keeps water from dumping into walls. The shape of the drip edge can keep it away from the outside, too. Like Jonathan said, it won’t push all of the water away,
JS: But hopefully, the drip edge significantly reduces the load and concentration of water so we can avoid the typical cladding staining that we see on so many claddings.
Why it matters
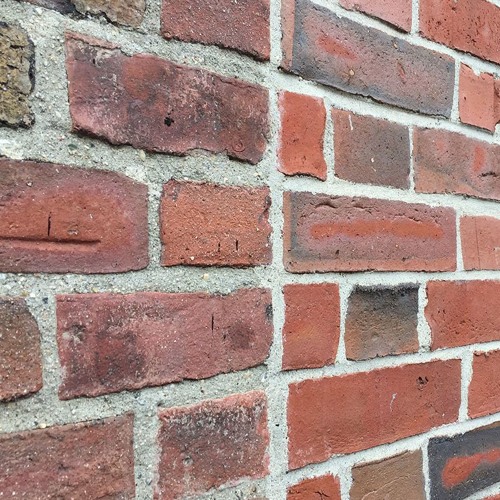
Now, nobody likes stains on their siding or efflorescence on their brick. But the stains are not really the problem, they are the result of a water problem that may cause a lot more—and worse—problems.
JS: In the worst case scenario, these concentrations of water on the surface of the cladding can lead to premature masonry failure either by weathering and erosion of historic masonry systems, or by saturating the masonry in areas susceptible to freeze-thaw damage causing spalling of the brick and failures of the mortar.
It can also rot the wood framing if it gets inside the wall.
SG: Right, again, water is public enemy number 1 to most or all building materials. So we want to keep water away from wood framing.
How to get it right
Using a flashing to collect and direct it out and away. So, what shape should the drip edge be?
SG: Any drip edge is better than no drip edge, however research at our Waterloo lab has shown that a 45-degree angle at the bottom of that vertical face of metal really helps to shed water and kick it out away from the building.
This research came about from a forensic investigation into an architectural bloodbath.
JS: It was because of a case that we were involved with that included premature building failures, cracking masonry, that we started to look into drip edge design, and the performance in more detail.
So the engineers built an apparatus…
JS: We built an apparatus, for our lab, that quantitatively measures how much water is shed off the surface of an enclosure below a drip edge system.
The apparatus is basically a stack of gutters with small gaps at the top of each one, for water to dribble into. A known volume of water was applied to a specific drip edge profile and every six inches or so of wall surface below the drip edge, water can drain into a gutter.
This way, they could measure exactly how much water was collected by the troughs on the wall and calculate how much water was shed away from the wall by the drip edge.
JS: By measuring the water in different troughs below the drip edge we found how effective the drip edge design was at removing water from the surface. And avoiding concentrations of water on the simulated cladding below the drip edge.
They tested two shapes of drip edge with two versions of each shape.
JS: The four main drip edge profiles we looked at in our study were a vertical drip edge profile with and without a hemmed edge and we looked at a 45-degree angled drip edge with and without a hemmed edge.
They tested these four profiles at different overhang distances from the cladding system below.
JS: One of the most surprising findings was the impact of the hemmed edge on the bottom of the drip edge. What we observed was on the hemmed edge, water would travel down the drip edge and be wicked back toward the surface of the cladding.
SG: The curve of the hem pulled water back slightly toward the wall, instead of continuing to direct it away from the wall, like you’d expect.
JS: Because of the surface tension of the water flowing over the drip edge, the hemmed edge actually directed water back at the surface of the wall.
The larger the radius of the hemmed edge, or the thicker the material, the greater the amount of water that was directed at the surface of the wall.
And that's bad news for builders who have been trying to do the right thing by plunkling down extra money on thicker metal and hemming it up nice and clean, only to get slapped in the face with physics.
JS: Correct. With thinner gauge metal, the radius on the bend was smaller, and therefore did not direct quite as much water back toward the surface of the wall.
Some findings that were not surprising?
JS: As expected, overhangs that were further away from the wall surface performed better at shedding water away from the wall surface.
Drip edges that were closer to the wall had more water collected in the drainage troughs below the drip edge.
So, thicker metal is great, but if you hem the edge, it may be worth bumping the overhang out another inch or stepping down to a slightly thinner metal. Either way, an angled drip edge is better than one that just projects downward.
SG: Some architects like to have a shallow angle because it looks prettier, however our research has found that that’s not as effective as a key 45 degree angle.
Earlier I said that we’d talk about the stone sills with saw kerfs that we talked about in the architectural projections podcast, so Jonathan plopped one more profile on the gutter box: a stone sill with a saw kerf underneath.
JS: What we found was that the stone sill actually did a much better job of distributing the water horizontally, and the saw kerf stopped the water from wicking back toward the surface of the enclosure—avoiding concentrations on the cladding, below the drip edge.
Concentrations of water on cladding is bad, but concentrating on facts is good—because you get paid for what you do and what you know. Listening to this podcast is one thing you can do to know more.
If you like this podcast, give it a thumbs up or positive review and share it with your peeps. We want to thank RDH Building Science for lending engineers to our show so enthusiastically and repeatedly.
Subscribe: iTunes | Google Play | SoundCloud
—7 Minutes of BS is a production of the SGC Horizon Media Network


