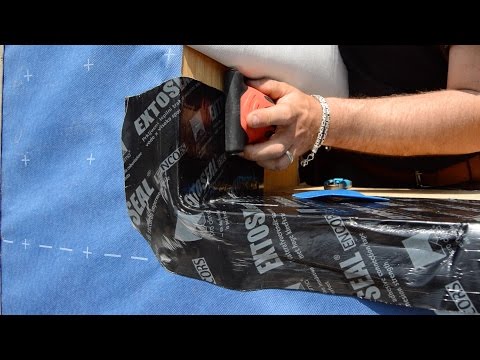
Flashing a window opening in a "thick" wall—deeper than 6 inches—is a critical step in preventing bulk water intrusion. You can do it using either stretchable or non-stretch flashing tape.
As part of the renovation to a 1970's raised ranch, the energy performance is being significantly improved. Triple-glazed windows are being installed and four inches of rigid foam insulation will blanket the walls and roof.
In thick walls like this, windows can be installed to the inside or outside, called "innies" and "outies," respectively.
These three videos are about innies.
1/ How to Flash an Innie with Non-Stretch Tape
David: We like to install windows over a sloped sill ...
Dan: ... and then they use some sort of flashing tape to protect the sill plate. In this video, we’re going to focus on using a stretchable tape. John starts at one end—folding it up the jack studs about 2 inches—and works his way to the other end ... making sure to wedge it tightly into the corners.
David: "On this, we have a pan flashing, but we also need another flashing that will go out over our foam afterward."
Dan: Because the stretchable tape doesn’t have a split release paper, they stick another section of flashing tape to the exposed sticky edge so that it will span the exterior foam.
3/ A Hybrid approach to pan flashing: Stretchable and Non-Stretch Tapes
TRANSCRIPT:
The first steps in the process involve prepping the rough opening. The carpenters have to fill in the extra pieces above the window to flush things out.
Dave: "We like to install windows over a sloped sill, so we use beveled siding. I'll put a couple of nails in there to hold it in place because we will be shimming the window on this and putting a peel-and-stick membrane on it."
Some tapes can stretch around corners, but Dave’s going to demonstrate with a standard, non-flexible flashing tape.
Dave: "You see there's a little piece of plastic inside, like a fishing line."
First, he splits the release sheet.
Dave: "Pull that out."
He works from the center out to either side, keeping the flashing tape along the inside edge of the window.
Dave: "Later on we're going to put 4 inches of foam on this house. So we'll put another piece [of flashing] on; we want to be able to go out over the 4 inches of foam and turn down."
Now we can cut the tape—not quite all the way, which leaves a little bit to stretch.
[INSTANT REPLAY]
Dave: "I'm putting 2 inches to the outside and the rest is going inside."
Dave wraps the corner, putting only as much peel-and-stick inside the rough opening as the depth of the window. He cuts the bottom, but again not tight to the corner so he can bend the tape around.
Dave: "The corner is the weakest point—and we've crossed it twice. Then we can put another little piece on that will go over it again. Even though this would be kind of like a reverse-flash, it is already flashed. It's not really a reverse-flash."
We're giving the corner, the weakest point, triple coverage.
2/ How to Install Pan Flashing With Stretchable Tape
This is a hybrid approach to pan flashing from Dave Joyce and John Albert of Synergy Construction. It uses both standard non-stretch flashing tape and a stretchable tape.
It begins, as always, with a sloped sill.
Then John applies square pieces of stretchable tape to the corners.
Next, he cuts the flashing tape top length and removes one side of the release paper.
Working from his left to right, John applies the flashing tape to the sill, turning up the edges a couple of inches at each end.
Because the corner is already flashed, you can just cut straight up, allowing the bottom flap to be applied to the exterior foam when that is added later.
—David Joyce, owner of Synergy Construction in Lanchaster, MA donated his jobsite for us to shoot video. Thanks Dave.


