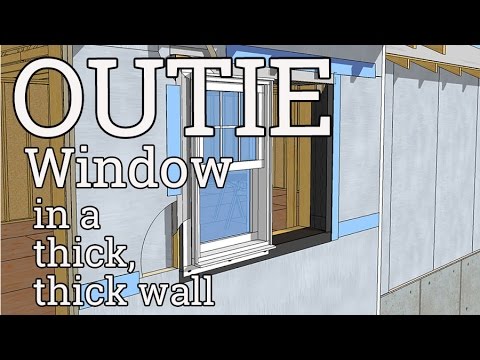
We have been covering different ways to build thick, superinsulated, walls, now we are going to explore installing windows in thick walls.
One of the first questions I get after I publish a video or article about thick walls like these is about windows and doors. I think the better question for walls with four inches of foam would be "How do I attach the corner boards?"
But it’s usually about windows.
First, we’re going to go over the job description of a window in the first place, and then we’ll think through a couple of considerations before covering how to install innies and outies, both in animation land and in the real world.
Finally, we will peek at an in-betweenie.
Windows are supposed to seal big holes in walls
So windows are part of the exterior shell, or envelope, so they have to do the same thing that other parts of the wall have to do:
- They need to control air, water, and heat.
- Windows also have to selectively stop light. They need to be clear, so you can see through them, but they need to stop the UV and IR spectra, but that’s not our problem.
Our problem is how to install them so that they will not leak heat, air, or water. The first animation shows how to do it in a regular wall, without exterior insulation. It comes from the best practice guide of BOWA in the Washington DC area.
Summarizing the job description: be like a wall, but be selectively transparent.
Innie windows vs. Outie windows: Which is better?
So which is better, innies or outies? Both. They’re both good at different things.
What both should have in common is that there is a continuous air barrier, a continuous water barrier, and a continuous thermal barrier for the wall.
There are a lot of thick wall types, as we saw in the last class. Double-stud construction puts solid framing lumber on the inside and outside of the wall, so fastening trim is basically no different inside or outside.
Trimming a window outside a wall with four-inches of foam outside the framing is a lot different. If the exterior carpenters aren’t as good as the interior finish carpenters, maybe it’s better to make it easier on the exterior people.
The other issue kind of relates to the WRB.
For this system, as you’ll see, the WRB is going behind the foam, It is a lot easier to integrate the WRB and the window if they are in the same plane.
Some details call for the WRB to be outside the foam, but I think the only reason for that is to integrate it with the window. Just because the WRB is back behind the foam doesn’t mean you must use innie windows, it just means it is a little easier.
Innies provide more shelter for the window
We’ve gone over innies vs outies and declared a tie, we can move on to taking a closer look at innies.
Innie windows shelter the window better. Windows that don’t get wet, leak a lot less than windows that do. They also shade the windows, so they potentially allow less heat gain and less UV damage.
They are essential if using replacement windows because replacement windows sit inside the original frame.
The window in the picture is an innie. There are four-inches of foam on the outside of this house, we saw Calvin and Damien putting it up in the last videos.
So you remember they left 2-1/4 inches of window frame visible, about an inch of that is covered with an extension jamb.
To trim the window, they preassemble the casing and nail it to a four-inch extension jamb. They fasten through the casing into a furring strip, which is the rain screen for the siding.
Thie next animation shows how to install an innie window in a wall that gets exterior foam insulation. It shows generally how the trim covers the edges of the foam.
It is pretty straightforward: Install the window as usual, but extend the pan flashing out past the exterior foam. The trim surprised me in the simplicity, but we do the same thing on the inside all the time. Build custom jams extensions for deep recesses.
And the extension jambs don’t have to be watertight, either because the window is already installed water-tight and the face of the foam is the drainage plane, so it is intended for water to get back there.
The video shows the same detail in the real world, beginning with the window opening before they installed any foam on the walls. You remember the windows were already installed when the guys were installing foam the split-level ranch we saw in the previous class.
Now we’re backing up to that step: flashing the window opening and tying into the WRB.
The video was shot before stretch tape was a widely-accepted thing. And before it was cheaper than it is now. David is kind of a cheapskate.
The point is that it is usually the corners that get damaged, so it’s important to protect them with flashing.
OK, I’m skipping the video about installing the windows because you already know how to do that, But after the opening is flashed, they plop the windows in the holes and get them all lined up so the trim will look good.
Here’s a clip from the earlier foam video about how the WRB and window integrate: It's a little out of focus, but the detailed thinking is good. It is important to be aware of all the layers you’re making and to make sure you terminate them.
Outies provide more shelf space (great for cats and bowling trophies!) inside and don’t look odd
Done with innies. Basically, the same window install as a house with no exterior insulation, but you bring the sill flashing all the way out to the face of the foam, and you extend the window trim into the face of the window.
Outies are also relatively simple, but complicated. The windows in the animation and following video are installed using wooden bucks that provide solid nailing for the window flange and the exterior trim.
The wooden bucks are woven into the foam. At least they are in the method I’m highlighting. This is David Joyce and his crew again, on a different house with a little addition that I call the superinsulated sunroom. Because it is new construction, they can choose any design they want.
The WRB in this case is ZIP sheathing, so that presents no real advantage for installing the window as an innie. Before I show his guys installing the windows, I’ll show a general animation that does have a house wrap WRB, so you can see the process.
After house wrap, the first layer of foam is installed. The windows are then installed with the second layer of foam.
Again, pretty simple in a perfect world. It kind of seems like the one I would do if I had to choose because I just like the idea of nailing stuff into wood. But I’m doing innies on my house right now because it’s a retrofit.
Now let’s look at the video of David's crew weaving the nail bucks into the foam, installing the second layer, and the taping sequence in the real world. The first layer of foam provides a thermal break for the nail bucks which are screwed through the foam back to the framing.
The key detail is that the flashing tape covers all of the layers from the outside face of the foam all the way back to the 2x6 wall framing.
Because everywhere that two materials meet is a leak unless it is sealed. Let’s hit the next video about finishing the exterior foam.
A key detail is that z-flashing above the window, another is the incessant covering of all gaps at the edges of layers.
In-Betweenies make the most sense in very thick walls
So that’s innies, outies, and now we’re going to do in-betweenies.
For that, I’m going to highlight Ben Bogie, a kickass carpenter in Connecticut, who did that exterior I-joist cabin earlier on. The walls are about 14-inches thick, so it’s a good example of when in-betweenies make more sense than innies or outies.
So you can see the window well is a lot deeper than the 2x4 framing, and you can also see a lot of wall still outside the window. Putting the window halfway in the opening still provides ample space for cats, and about seven-inches of shelter on the outside.
Here’s part 1 of the flashing process.
One thing to note, Ben is a little OCD, and nerdy, to boot, so that makes him a really great high performance builder. The flashing tape is super-wide with three release sheets on the back, which makes it a LOT easier to flash deep openings like this.
Little things matter a lot sometimes. Let’s look at the rest of the window flashing. Again, the main principle is to seal everything back to the framing.
The practical details are to not get ahead of the tape and to keep it away from your beard. Because when flashing tapes stick on hot days, they really stick.
I’ve skipped the last two window installations, but this one is different enough that I think it is worth including. They are triple-glazed casement windows with deep snap-on sills.
The windows are not flanged—nor can they be—because there is no framing in the middle of the window opening to nail into.
On the first window, the innies, David and his crew also used European triple-glazed windows that had metal straps for fastening. Those windows also had ‘taping flanges’ that help to align the window in the opening, but they are not structural nailing flanges.
On this project, Ben bridged the window to window jamb with sticky tape and he squirted canned foam on the inside.
And that wraps up the window section of the Continuing Education Tour.


