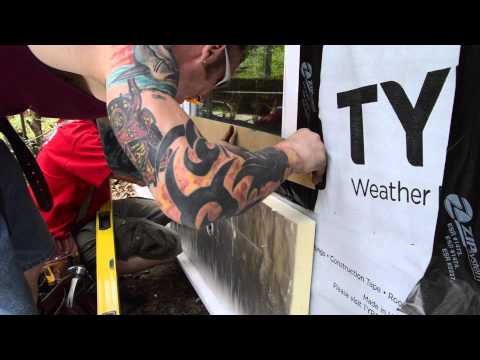
From extension jambs to mullions, begin with the biggest piece and work to the smallest
OFFICIAL TRANSCRIPT:
Exterior window trim out is one of the first steps in siding—which is one of the final steps to this deep energy retrofit and gut rehab in Concord, Massachusetts
Synergy Construction has added new window openings, flashed the openings installed new triple-glazed windows. Next, the guys added four inches of foam to the outside of the house.
Inside, the windows are flush with the wall surface. Outside, the windows are set back from the wall surface. That means they’re innies.
Step 1: Extension jambs and casing
To bridge the foam, extension jambs are added to the outside. Fastened to the window casing, they rest on a sill which is pocket screwed into the framing. The extension jamb is preassembled and test-fit to the openings. This opening is for sliders that will lead onto a screen porch.
Sometimes the foam has to be trimmed back a bit to get the correct reveal along the top and sides. The rest of the guys were giving John quite a ribbing about this, which is why I’ve added the extra footage, so keep that in mind when you’re doing the foam.
When the extension jambs fit correctly, window casing is added to the jamb and then the whole assembly is installed, screwing through the casing into the framing.
Lentil and Mullions
For simple windows and doors, that’s where it ends. But for complicated window banks like this, that’s where the fun begins. The lentil and mullions of this window frame are covered with aerogel insulation which is held in place with flashing tape. The trim will need to bridge that extra thickness without appearing humpy, so each trim piece is actually three pieces put together.
Technical Question: What are the vertical and horizontal trim elements between the window units? @BrentHull1? pic.twitter.com/WdCTBp8eWd
— ProTradeCraft (@tradecraftsman) February 22, 2016
@tradecraftsman The term is Mullion. It refers to the vertical member that separates windows. The horizontal member would be a lentil.
— Brent Hull (@BrentHull1) February 22, 2016
The long horizontal piece of trim is called a lentil. It extends from one end of the window bank to the other, so that it the first piece to install. It looks like a 1x6 on the flat with a drip cap on top. But the drip cap extends back to hold the casing off the insulation. A series of blocks on the bottom fill the space between the for the vertical mullions.
With the mid lentil assembled, the guys install it with exterior grade trim screws. Now, it’s time to get some numbers for the vertical pieces. When Dave has a rough number to build to, he gets to work preassembling the lower and upper mullions. These pieces are a simpler shape—a facepiece and a couple of extension legs with a 1/4 inch reveal along the joints. They are held together with a brad nailer.
Meanwhile, upon the scaffold, Calvin is installing the lower mullions. They will have to line up with the mullions above, and they need the right reveal on each side of the window frame. So Calvin takes his time getting it right—where it needs—to be. And then he screws it home, for a nice tight joint.
He lines up the middle and bottom and screws them into position. Now it’s time to holler down numbers for the top pieces.
Measuring Tip:
Instant replay: Wait—did you see what he did there? He measures up 10 inches, and then measures down to the mark, adding 10 inches to the number on his tape That way he doesn't have to bend his tape into the corner and guess about it.
He tests the fit of the first mullion in various places and finds about a little variation, so he uses this one where it fits and Dave cuts a slightly shorter one for the other end.
With the last of the trim work installed, Calvin cuts away the flashing tape that is still exposed and pulls it off the window frame.


