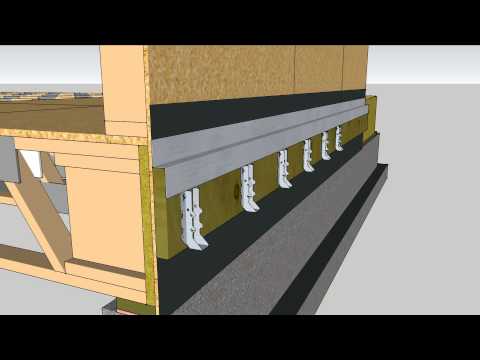
Tips on engineered wood layout, framing, cantilevers, blocking, web stiffeners, cutting, knockouts, duct runs, rim boards, and beams.
OFFICIAL TRANSCRIPT:
The latest information is available on how to build a solid high-performance floor assembly using engineered wood products.
The information was developed to assist builders, trades, and inspectors in the installation and inspection of floor assemblies properly constructed with engineered wood products.
Note that in addition to the practices outlined here, all applicable and local building code requirements and all specifications established by the licensed professional for the project must be followed.
Engineered wood manufacturers have put together field framing guides that are widely available. A product-specific guide should be maintained on-site with blueprints.
I-Joist Layout (1:06)
Assembly of the floor system begins with I-joists laid out on the sill plates of the foundation walls. I joists can be spaced at 12 inches, 16 inches, 19.2 inches, or 24 inches on center as is typical for structural components of a residential floor system.
I-joists forming multiple spans that carry a bearing wall require blocking between I-joists at the bearing wall location.
Separate span tables for multi-span conditions allow even greater clear spans between bearing points in multiple span conditions.
Cantilevering I-joist (1:45)
I-joists can be cantilevered beyond the foundation to accommodate designs that include a bay window or a fireplace chase for example. For these designs where the cantilever supports concentrated loads, solid blocking between the cantilevered joists at the bearing location and web reinforcement of the cantilevered web portion for two times the cantilevered length are required.
Similar details apply to balcony cantilevers. Refer to manufacturers’ literature for accurate details.
Stair openings (2:15)
Openings in the floor system to accommodate stairs generally require Glulam, Structural Composite Lumber, or two-ply trimmer I-joists.
When two ply I-joists are used, filler blocking, consisting of sawn lumber of the approximate size of the web is required.
With two-ply I-joist trimmers, all three members are connected and provide a nailing surface for a strap hanger carrying the header at the stair hole.
Headers are usually specified as Structural Composite Lumber or Glulam, depending on the span carried.
Blocking (2:50)
Crush, or squash, blocks may be 2x sawn lumber, rim board, or SCL cut 1/16 inch greater than the depth of the I-Joist and connected to its top and bottom flanges with an 8d nail.
The blocks are installed at both ends of an I-Joist where a bearing wall is supported.
Web stiffeners (3:09)
Web stiffeners are pieces of minimum 15/32 inch wood structural panel attached to the I-joist web between the flanges.
These specialized hangers for 16 inch I-joists do not require web stiffeners.
Blocking between I-joists or continuous rim board at exterior walls perpendicular to I-joist floor framing is required.
Rim board (3:35)
Engineered wood rim board is specifically designed for use with I-joists to avoid differential shrinkage because swam lumber shrinks more than engineered wood with the changes in moisture content expected when the material is in service.
Bracing during installation (3:54)
I-joist top flanges must be temporarily braced before and during subfloor installation. Typically, 1x4 lumber is used for temporary bracing. Permanent bracing is applied by the subfloor after it is glued and fastened.
In multi-span continuous or cantilevered applications I-joist bottom flanges require permanent bracing as well. Gypsum board serves this purpose for assemblies with finished areas below.
It is important not to walk on or load a floor that has not had the floor or subfloor permanently installed because the I-joists may topple over.
Holes for mechanicals (4:27)
Once the floor assembly has been completed, the mechanical trades will use knockouts and field-cut holes in the I-joist web to install pipes, wires, and ductwork. Knockouts are factory-punched outlines of 1-1/2 inch diameter holes in the I-joist web. They can be opened up with a hammer tap to the spot.
This sized hole may be cut anywhere in the I-joist web so long as it is at least 3 inches away from other holes of the same size and is beyond an area within 6 inches horizontally and 6 inches vertically of the bearing load transfer point of the I-joist.
Duct chase holes should be centered horizontally within the middle one-third of the span of the I-joist and centered vertically between the flanges. Maximum width and depth of holes varies by manufacturer and I-joist depth.
General rule of thumb:
1/8 inch of OSB web should separate the hole from the flanges and the width of the hole should be no greater than the I-joist’s web depth, however consult the layout plans and manufacturer’s recommendations.
Cutting I-joists (5:35)
Measure twice, cut once. Use a sharp blade to cut square openings in I-joist webs and avoid over-cutting at the corners of the openings.
Flanges can never be cut, except when cutting the I-joist to length.
Do not use damaged I-joists.
Following practices presented in this program will result in a sturdy structural floor frame that performs solidly for many years providing added value to the builder and the homeowner.
Source:
- Home Innovation Research Labs (www.homeinnovation.com)
- USDA Forest Products Laboratory (www.fpl.fs.fed.us)
More Info:
<code>
2021 IRC:
</code>
—Home Innovation Labs is dedicated to improving the quality, durability, affordability, and environmental performance of homes and home building products. A wholly-owned subsidiary of the NAHB, Home Innovation Labs helps to eliminate barriers to innovation in the residential construction industry through research and testing in their labs in Upper Marlboro, MD
