Welcome to ProTradeCraft’s Weatherization Nation. A show about building smart from the start. See all of the episodes here
Last week we tore down an addition on the back, which left four large holes in the house.
Ray and his crew have a method for filling those holes to keep the dust out of the living space if clients choose to remain in the house during renovation.
Ray Williams: “We put up some temporary walls. We went with 2x4 walls to get R-13 insulation, we put 1/2 inch OSB on the outside, so we could seal it off, and we put plastic on the inside.
We used sill seal on the top and bottom to really try to do anything we can to mitigate any dust as the homeowners are living in the house.
It’s a good thing that Ray and his team were inside, keeping the dust down because the excavators and foundation crew were outside digging a big hole and filling it with footings and block walls.
While they were at it, the foundation crew incorporated a footing drain and a dimpled sheet drainage mat on the outside of the foundation.
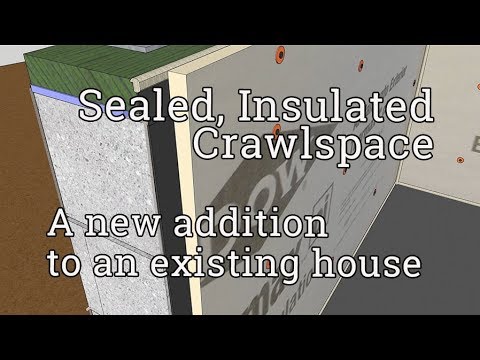
This week, we’re going to fill that hole with a warm and dry crawlspace.
First, they’ll waterproof, and next, they’ll insulate the walls with Thermax foam insulation.
Here’s what the plan looks like in animation land.
Sketch Desk: Keep water out of—and heat inside—the crawlspace
Footings sit on the earth, which is always wet. To keep the footing from acting like a wick, paint a dampproofing layer to the top.
Now you can build the block wall on top, waterproofing the outside too. A dimple sheet is a great way to disrupt groundwater from pushing past any gaps or cracks.
To keep airflow to a minimum, all cores of the blocks are filled with mortar. It's also a structural thing.
Set the anchor bolts, and you’re ready to install the mudsill, which sits atop a sill sealer gasket.
MARK IV goes the extra step of sealing gaps between mudsills with an elastomeric caulk.
Seal against horizontal airflow as well as vertical flow.
Once the plates are sealed together, you can bolt down the mudsill and move inside.
On top of the compacted ground, add a layer of gravel before laying the plastic.
Another tip from MARK IV is to use some cruddy beat-up plastic over the gravel and under the finished plastic.
This first layer is a sacrificial layer for construction, saving the vapor barrier plastic from nicks and cuts caused by workers walking on it.
It also reduces plastic in the landfill.
The vapor barrier covers the floor and runs up the walls.
Any seams should be overlapped and taped with a high-quality contractor’s tape, such as DOW WeatherMate.
The top of the plastic is stapled into the mudsill, and the walls are covered with Thermax Polyiso foam boards. Polyiso foam is much better for GreenHouse gases because the blowing agent is water.
The edges are sealed with GreatStuff foam along the top, corners, and bottom edges. All of those layers add up to a high-performing crawlspace that shouldn't have any leakage problems.
Git ‘er done: Install Plastic vapor barrier and foam insulation
Before laying sill sealer, Ray sweeps the top of the block foundation. But before even that—a day before, in fact—Sorell beds insulation spikes to the walls using a bucket of construction adhesive and a gazillion-in-one tool.
He doesn't just place them wherever it strikes his fancy, either; he puts them with the foam board insulation in mind. You can see where one sheet ends and another begins; he places a pair of spikes.
Between the edges of the sheets, he places them every two feet, staggered up and down.
With the spikes dried into place, they finish sweeping and get after cutting the mudsills and poking holes for bolts.
When laying the sill sealer gasket, Ray folds the gasket up to seal the gap at the end of the mudsill. Sure, it’ll get foamed later, but gasketing connections is always a good idea.
Gaps they cannot gasket, get sealed with caulk. He details the top of the joint to make it tight and clean.
Before laying the plastic, Ray has a tip
Ray: We've found that when we do this with the gravel down, as you're working on it, you stretch it out and sometimes you can tear, rip or puncture the plastic.
So we take some of the leftover stuff that we've got and put a couple of strips down.
That way, when we put our six-mil or eight-mil on top of it and we're walking and working on top of it, we're not actually making holes in the vapor barrier.
They roughly cover the gravel, not trying to make it airtight or watertight, just covering the main traffic areas.
Now they break out the good stuff.
It will fold up the walls, but it also needs to penetrate the insulation spikes without bending, so they stretch it out roughly and then work it from one end to the other onto the spikes.
Ray: so we don't create any tightness on that bottom corner
With the plastic in place, Ray staples the top to the mudsill.
The insulation boards slide onto the spikes, and the top of the sheet can be screwed into the mudsill using screws with button caps.
Friction-fitting washers tighten the insulation to the wall, and then the business end of the spike is snipped off.
He covers the washers with scraps of flashing tape, mostly to reduce nicks and cuts to workers, but also to interrupt the slight thermal bridge that the spike creates.
Finally, Ray covers all of the tape with a piece of foil tape. The only reason for this is to reduce the number of times he has to answer the same question:
"Why are there little pieces of tape everywhere?"
And the inevitable follow-up:
"Why are some of them white and others are red or black?"
On that topic, here’s another tip that we learned from Dr. Joe Lstiburek:
Use black plastic for this job rather than clear plastic
The plastic’s job is to keep moisture out of the living space. By definition, this means that moisture collects underneath it. If you use clear plastic, the homeowners will call you in the middle of dinner to ask why there is so much water under their crawlspace.
If you use black plastic, that call will never come.
With the insulation in place, they get ready to seal the edges with some really great stuff.
They hit the gap at the bottom and where the insulation butts the existing house
And Ray cuts off the excess plastic.
Ray: What I’m doing is trying to cut it on a bias, at a little bit of an angle so that the canned foam will grab to the back side of the foil and the sole plate.
A final run with the canned foam seals the seams and the top of the assembly.
Next time: Installing a Tyvek WRB
While we’re waiting for the next episode of Weatherization Nation, the framers are going to frame walls, stand them, and nail ‘em together.
When they’re sheathed, we’ll be able to apply the Tyvek WRB and learn from an expert why it matters.
Then we’ll flash and install a leak-free window in our weathertight wall.
