Guardrail posts must be solid, so double-check the structural hardware and fastener placement. Check with the local municipality for code requirements.
Step 1: Temporarily support the post
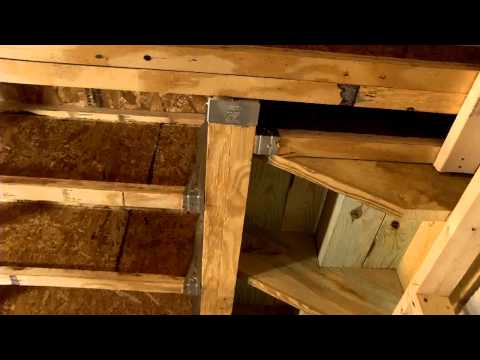
Start by attaching a scrap piece of lumber under the deck frame to support the guardrail post while fastening.
Attach to both joists adjacent to the guardrail post. Use 3” exterior grade wood screws to fasten the scrap block to the underside of the deck frame. Install this block at every location where a guardrail post will be installed. This block will be removed once the guardrail post is completely installed.
Step 2: Gather materials
The materials needed to install a corner guardrail post are as follows:
- Treated wood 4x4 post for the guardrail post
- Treated wood 4x4 post block measuring the same width as the deck joist material
- (2) 2X joist material cut to fit in between the adjacent joists
- (12) Simpson Strong-Tie SDWS 8” Timber screws, 4) other screws are shown in the diagram, and they were installed during the front rim joist installation.
Step 3: Consult the guide
The corner guardrail post attachment is shown below in the Simpson Strong-Tie fastening guide.
To learn more about multiple guardrail post attachments, check out this guide by Simpson Strong Tie.
Step 4: Cut the guardrail post blocking to length
Measure the distance between the adjacent joists and mark the pieces of joist material to be cut. Cut with a circular saw and treat all cut ends with a wood preservative. Pro Tip: Cut all the blocking needed for all the guardrail posts simultaneously. Measure each section and note the needed amounts. Cut, treat, and place all blocks in their respective areas. This will get the cutting all done at once, and then we can move to the installation process.
Step 5: Place the 4x4 guardrail post
A post level or a standard level can be used. Use a 3” exterior grade wood screw to tack the post to the frame. Fasten the screw into the bottom of the post on one side. This will let the post stand and still move to the other side to be plumbed.
Step 6: Plumb the post and fasten
Using a post level or standard level, plumb the post and install a 3” exterior grade wood screw through the top of the frame and into the post.
Step 7: Locate the fasteners
Measure and mark the fasteners holding the guardrail post blocking behind the post.
These fasteners will be the Simpson Strong Tie SDWS 8” Timber screws. The blocking is 1 ½” thick joist material and will fit tight to the post. The fastener needs to be in the middle of the blocking so measure over from the edge of the post ¾” and make a mark. The second block will be tight to the first block and is 1 ½” thick so measure from the first mark 1 ½” and make a mark. This will be the center of the second block.
Step 8: Transfer fastener layout to joist
Transfer the marks down the side of the joist using the speed square. To make sure the fasteners on the side do not hit the fasteners coming in from the front, mark 1 ½” down from the top and 1 ½” up from the bottom. The front fasteners are marked at 2”, so now they will not hit each other.
Step 9: Mark the post center
Mark the center of the post on the front rim joist and transfer the line down the joist. The marks are already there for the fasteners at 2” down from the top and 2” up from the bottom, so where they intersect is where the fasteners will go.
Step 10: Lay out the blocking
Mark the center of the 4x4 blocking and transfer that line down the front of the front rim joist. The fasteners will be located where the lines intersect. Repeat the markings for the side rim joist onto the next adjacent joist.
Step 11: Set the blocking
Set the 4x4 post blocking in place next to the guardrail post and against the front rim joist. Fasten the two post blocks together with (2) 3” exterior wood screws. Make sure that the tops of the blocks are flush with each other.
Step 12: Fasten a scrap piece of lumber to the top of the two post blocks
Use (1) 3” exterior grade wood screw and attach in the middle of the scrap piece of lumber. The scrap should overhang each side by at least ¾” and flush with one side of the post blocking. This will allow the block to sit inside the two adjacent joists so that it does not need to be held. It will also allow the post block to fit snuggly against the post. Drop the block in place between the joists and tight to the guardrail post.
Step 13: Fasten the blocks
Predrill through the joists and into the blocks. Insert the fasteners through the joists and into the blocking. Make sure the head of the fastener indents into the lumber and is flush with the outside edge of the joist. Remove the top scrap piece of lumber to complete the installation.
Learn more
For more information and instructions, visit Trex Academy. Instructions provided by Trex® are based on the build specifications that Trex® demonstrated in the Trex® Academy video series and are not universal to all projects. A build may vary from Trex’s instructions based on the local municipality requirements, individual design preferences, and project specifications. For questions or assistance needed during your project, please contact howto@trex.com.


