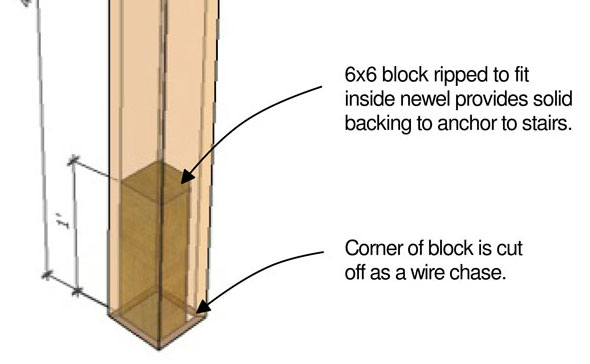
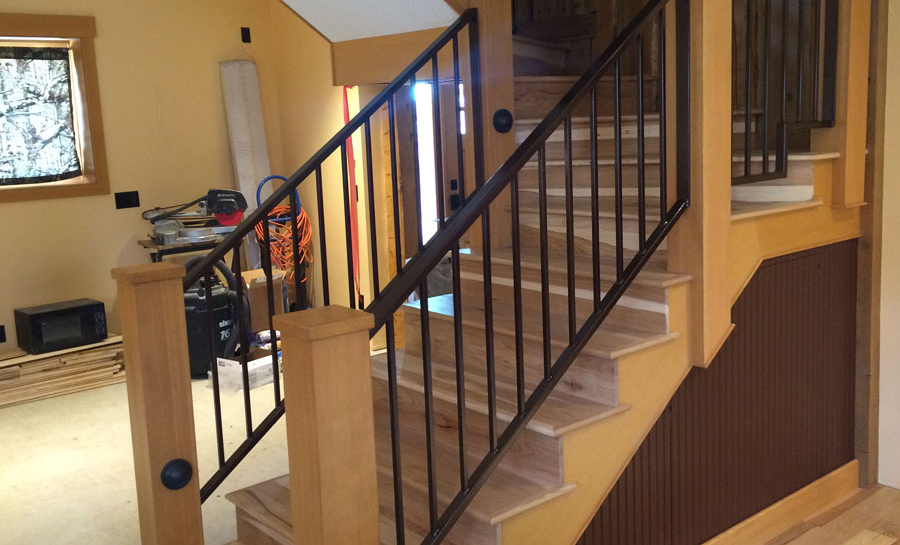
The newel posts for this stairway are 4-foot-tall, 6x6-inch vertical grain boxes with mitered corners made from Douglas fir. A solid block in the bottom is for mounting the KeyLock hardware or for securing the newel posts to the treads and risers.
(This is the second in a series of articles about trimming a stairway in a 100-year-old cabin built using vertical logs.)
The only post that could not be pre-built on this stairway is the center one, which I wrapped in place with individual pieces of the mitered fir. A few of the pieces had to be scribed around the treads and risers.
The other newel posts started as four 48-inch-long pieces of 1x8. I ran the pieces through a planer to take the cupping out, which reduced the thickness to 5/8 inch. To get rid of any crook or wain, I ran one edge over a jointer and used that edge to ride against the table saw fence as I ripped the 45-degree angle.
Next, I set the table saw fence so that I could rip the pieces to 6-1/8 inches wide to the long points. The extra 1/8 inch allowed me to run the long miters over my jointer and still finish with a 6-inch box.
The jointed miters will ensure a tight glue joint.
Biscuits align the joint and lock faces together
Once jointed, I cut biscuit slots along the edges near the heel, or short point, of the miter. For this application, I placed the biscuits 6 inches apart, starting 3 inches from each end.
Next, I laid the 4 pieces side by side and applied glue to the biscuit slots and along the full length of the miters.
A solid block at the bottom expands anchoring options
Before this, I had cut a piece of 6x6 into one-foot lengths and ripped them to the inside dimension of the box newel.
These blocks were installed using polyurethane glue in the lower end of each newel. I ripped one of the corners of the block off to create a chase for low-voltage wiring for lighting.
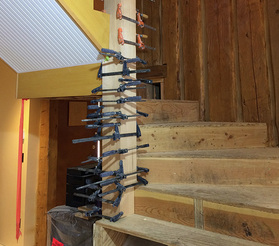
Assemble with bar clamps, patience, and more bar clamps
After installing biscuits in all of the slots in two of the boards, I assembled the four pieces, making sure I had plenty of bar clamps on hand.
I applied just enough pressure to make the joints tight, and the long points of the miters meet. No, I didn't try to make the wood grain line up at the miters. It was just luck. Once dry, I took the clamps off, scraped off the excess glue, and sanded all four sides with 150-grit sandpaper on an orbital sander.
I pre-drilled a 5/16-inch hole in the center of each block to accommodate the lag bolt from the KeyLock hardware. I also eased the mitered corners with a 1/8-inch-radius router bit mounted in a laminate trimmer so that the corners would hold a finish. I hand-sanded that with a sanding sponge.
Now that these box newels are ready for the painter, I'll swap them for the finished skirt stock and get to work installing those.
Other articles in this series:

