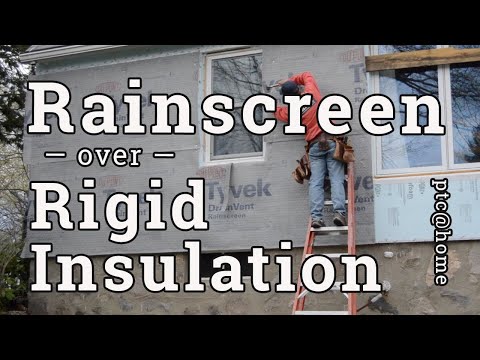
Now that the rainscreen is installed over the exterior insulation and the exterior trim is also installed, I can nail some siding to the wall.
Specifically, I’m using TruExterior nickel-gap siding. It is a polyash product that is dimensionally stable and rated for ground contact.
Prefinish the siding
We opted to paint the siding before nailing it to the wall because it will never be easier to paint than when it is on sawhorses.
After painting and before nailing, we did some testing to choose the best way to deal with exposed fasteners, so I nailed a test piece to the test wall to test how to hide those fasteners.
We decided that painting the nail heads was not the approach we wanted because even though they would be a brilliant shade of yellow, they’d still be visible. Instead, we opted to countersign the nails slightly and fill the holes.
The whole filling nail holes thing put a little bit of a wrinkle in the finishing process, but not much.
Patching nail holes
The first patching compound I turned to was Bondo because I’ve used it many times, and it always works.
But with a couple of coats of white paint on the trim stock, red Bondo didn’t go over very well. First, it would require sanding, and second, we weren’t sure how the touchup would blend. So I went searching for a different kind of filler. A white one, preferably.
The construction message boards seemed to agree that 3M’s fiber-reinforced exterior spackling works well on Boral products, so I opted for that.
We were also a little concerned about how the paint would take to sand the Bondo. I expected it to “pill-up” at the sanded edges, but when I got around to sanding it, The Valspar paint sanded smoothly and blended back to where it was supposed to be.
At the end of the day, we decided to prime and first coat all of the trim and to expect to second coat it in the air. Bondo appears to work perfectly well, but the 3M spackle is a heck of a lot more forgiving and quicker to install. Plus, it is not red, which highlights every hole where I missed a stud.
Installing the siding solo
So with a plan of action, I headed for the money wall. Part of the focus of this series is working alone because we developed it as a response to the covid shutdowns, social distancing, and labor shortages.
The siding is brittle and will break if you bounce the long pieces around. But a 16-foot piece of siding can certainly be handled by a single person. It is recommended to carry it on its side. Holding both ends against the wall is more challenging.
That’s one advantage to the pre-rabbeted trim boards and the ship-lap shape.
Tucking one end begins, the rabbet holds the end in place, and the shiplap notch holds the bottom. It is actually quite possible to install a wall of siding solo. There were only a few instances where I needed to convince one of my kids to hold the other end.
Even this board, which did not have a rabbet to tuck into, I was able to install a full 16-foot piece alone because of the shiplap seat.
The siding comes with two sides: wood textured and smooth, and you can get a nickel gap or shiplap for either surface.
Once again, it is a pretty smooth operation to do solo. The tricky part is running under the windows. The window stool that came with my trim package has a rabbet along the bottom to hide the cut edge of the siding.
This provides a clean look after it’s installed, but the foam and rainscreen drainage mat allows a little compression, so slipping the siding behind the stool rabbet isn’t always as smooth as you think it’s going to be.
Working around the windows
Coupled with the siding needing to tuck begins the corner rabbet, it was downright challenging. My solution was to break the siding somewhere under the window, splicing with a scarf joint over a stud.
I would run the ends longer than needed and trim them to fit after I was convinced that the scarf joint was perfect.
I could then cut the end for length, slide the window end into the window pocket and bend the far end out enough to slip it into the corner pocket.
As long as I had my ladder here, I continued up the wall to the top of the window.
Fastening specifications
Fastening specs for six-inch TruExterior boards are two nails into each stud for horizontal applications.
You can also install the boards vertically, in which case you cannot put two nails into each stud because studs also run vertically. In that case, the spec is two nails into the wall sheathing every 12 inches.
Then I moved over to the other end of the window and did the same thing. On this section of wall, I was still expecting to run a continuous frieze board along the top to act as head casings, but I changed my mind after trying it, stepping back, and looking at it. It just seemed a little too blocky., so I switched to head casings and drip caps.
When you’ve got two windows really close to each other, it may make sense not to use rabbeted trim on one of them because the short boards do not bend as well as the long ones do. So that’s what I did here. Running up the wall to the tops of the windows.
To finish out the money wall, I installed the head casings and ran siding up and over, butting up almost tight to the soffit where a backing block that’s a little thicker than the siding holds a trim piece just a bit proud, allowing ventilation air to escape.
ptc@home is a video series in which you can watch the editor of protradecraft remodel his house and heckle him on social media. This is the sixth segment of the series.
